
RTP Settings
To ensure proper media handling and WebRTC compatibility, you must configure the RTP (Real-Time Transport Protocol) settings in VitalPBX. This configuration defines the media ports and ICE (Interactive Connectivity Establishment) behavior for WebRTC communication.
Access the RTP Configuration
Section titled “Access the RTP Configuration”-
Log in to your VitalPBX Administration Panel.
-
Navigate to: Settings/PBX Settings/RTP Settings
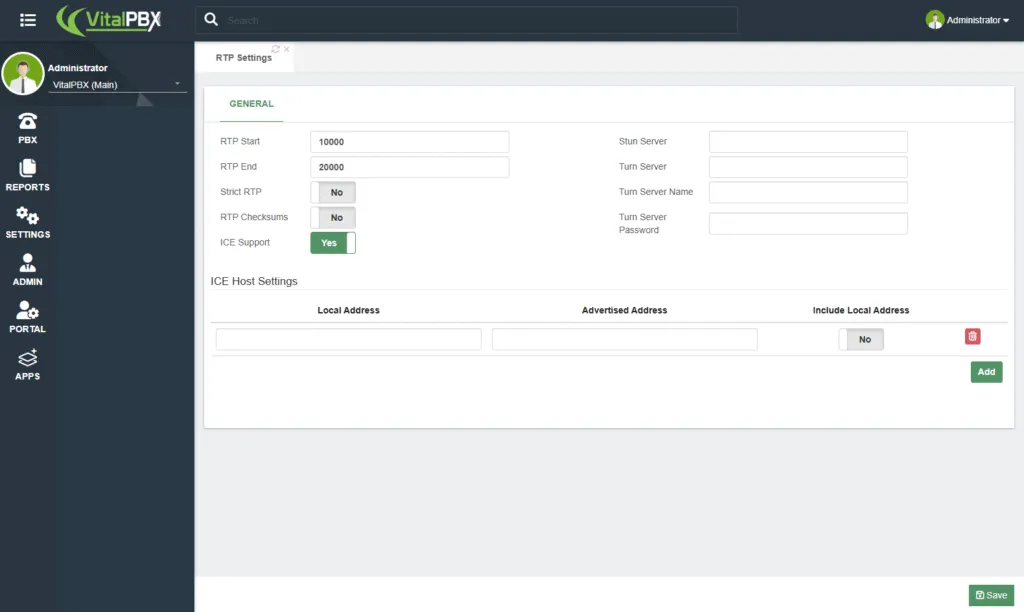
Recommended Settings
Adjust the following options as shown below:
| Setting | Recommended Value | Notes |
|---|---|---|
| RTP Start | 10000 | Default media port range start |
| RTP End | 20000 | Default media port range end |
| Strict RTP | No | Optional; leave disabled for better compatibility |
| RTP Checksums | No | Optional; may be disabled unless required |
| ICE Support | Yes | Required for WebRTC media negotiation |
| STUN/TURN Server | (Leave Empty) | VitXi already includes its own ICE server module for NAT traversal |
Enabling ICE Support is essential for establishing stable WebRTC connections through NAT and firewalls.
ICE Host Settings
Section titled “ICE Host Settings”The ICE Host Settings section allows you to define which IP addresses will be exposed during ICE negotiations.
This is particularly useful if your VitalPBX server is behind a one-to-one NAT or hosted on a private network.
| Field | Description |
|---|---|
| Local Address | The internal IP address of the PBX server. |
| Advertised Address | The public IP address that remote clients should use to reach your PBX. |
| Include Local Address | Set to No unless your environment requires both addresses for internal routing. |
After adding your host entries, click Add, then Save.
Save and Apply Changes
Section titled “Save and Apply Changes”Once all parameters are configured:
-
Click Save to store your changes.
-
Then click Apply Changes to reload the RTP configuration.
If you do not apply the changes, the new RTP settings will not take effect, and WebRTC calls may fail to establish properly.
Was this article helpful?
Your feedback helps us improve the documentation.
Thank you for helping us improve!